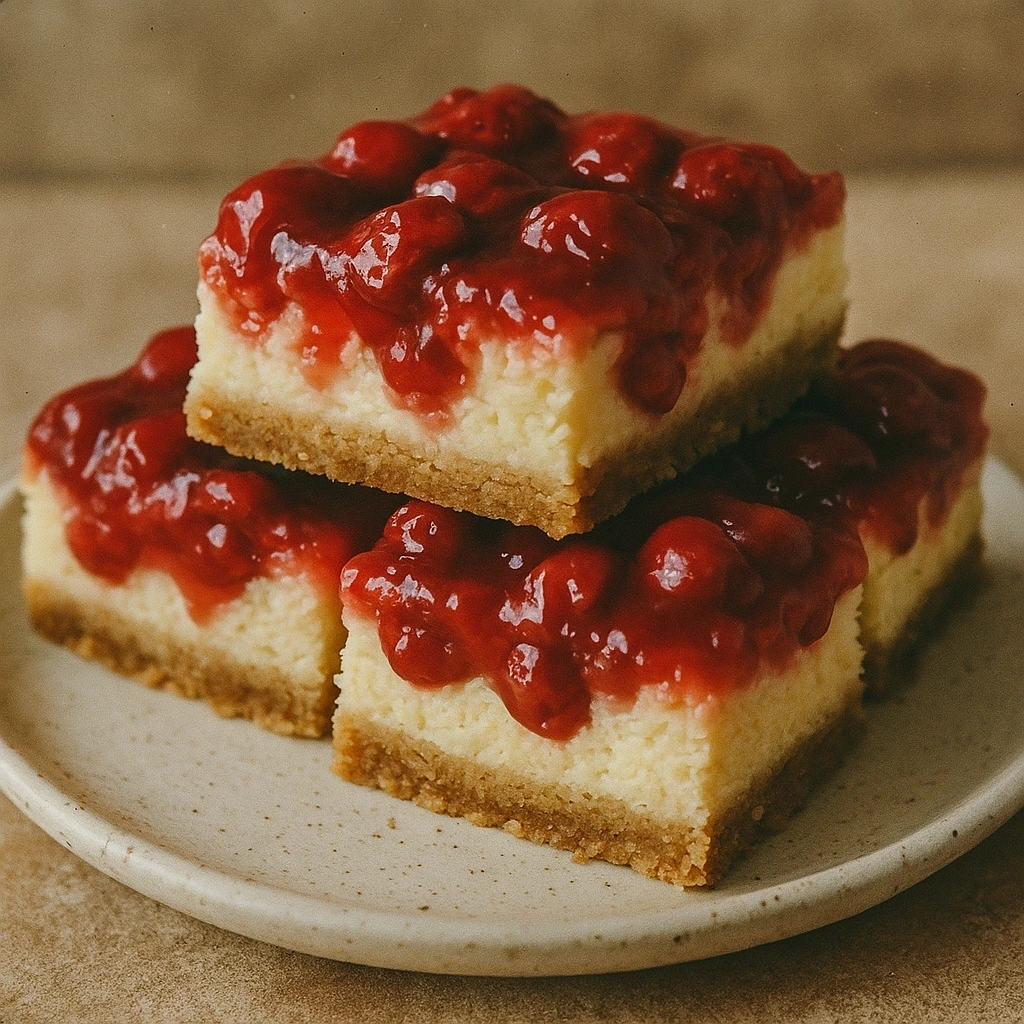
Are you looking for the ultimate dessert to make your holiday celebrations sweeter? If you love traditional cheesecake but crave something a bit more portable and easier to serve, Cherry Cheesecake Bars are the perfect choice! With a delightful graham cracker crust, a creamy cheesecake filling, and a vibrant cherry topping, these bars combine all the best aspects of cheesecake in a convenient form. Read on to find out how to make these irresistible treats for your next event!
Ingredients List
To make these Cherry Cheesecake Bars, you’ll need a handful of simple ingredients that come together to create an indulgent treat. Here’s what you’ll need:
For the crust:
- 1 ½ cups of graham cracker crumbs – These create a perfect, sweet, and crunchy base for the bars. You can substitute with crushed chocolate cookies or vanilla wafers for an interesting twist.
- ¼ cup of sugar – This adds just the right amount of sweetness to balance the flavors.
- 6 tablespoons of unsalted butter, melted – The butter binds the crumbs together and helps the crust become crisp as it bakes.
In favor of the cheesecake filling:
- 3 cups of cream cheese (softened) – This provides the creamy texture and rich flavor essential for any cheesecake.
- 1 cup of granulated sugar – Sweetens the filling to perfection.
- 3 large eggs – The eggs help create a smooth, firm texture in the cheesecake.
- 1 teaspoon of vanilla extract – Adds a wonderful depth of flavor.
- 1 cup of sour cream – Enhances the richness and provides a slight tang to balance the sweetness.
For as the cherry topping:
- 1 can (21 ounces) of cherry pie filling – The cherry topping is a showstopper. Alternatively, fresh cherries can be used for a more natural, fresh flavor, though canned pie filling adds convenience and consistency.
These ingredients combine to make Cherry Cheesecake Bars that are delicious, satisfying, and easy to prepare.
Timing
When it comes to making a holiday dessert, time is often of the essence. Fortunately, Cherry Cheesecake Bars come together relatively quickly, especially compared to traditional cheesecakes. Here’s the breakdown of how much time you’ll need:
- Preparation Time: 15 minutes
- Baking Time: 45 minutes
- Total Time: 1 hour (this is about 20% less time than a traditional cheesecake recipe, which usually takes more than 1.5 hours to prepare)
This makes them an excellent choice for anyone looking for a dessert that’s both easy and quick to prepare without compromising on flavor.
Step-by-Step Instructions
Making Cherry Cheesecake Bars is a simple and enjoyable process. Follow these easy steps to create a dessert that will have everyone asking for the recipe!
Step 1: Prepare the Crust
- Preheat the oven to 325°F (163°C). This ensures your oven is ready for the crust and the cheesecake filling.
- Mix the crust ingredients. In a medium bowl, combine graham cracker crumbs, sugar, and melted butter. Stir until the mixture is well combined and holds together.
- Press into a baking dish. Take a 9×13-inch baking dish, and press the mixture into the bottom to form an even crust. Use the back of a spoon to press it down firmly.
- Bake for 10 minutes. Pop the crust into the oven and bake for about 10 minutes, or until it turns golden. Once done, remove it from the oven and set it aside to cool.
Step2: Make the Cheesecake Filling
- Beat the cream cheese. In a large mixing bowl, beat the softened cream cheese and sugar until smooth and creamy.
- Add eggs. Add the eggs one at a time, beating after each addition to ensure everything is fully incorporated.
- Add vanilla and sour cream. Stir in the vanilla extract and sour cream until the mixture is completely smooth and well-combined.
- Pour over the crust. Once your crust has cooled, pour the cheesecake mixture on top, spreading it evenly with a spatula.
- Bake for 40-45 minutes. The cheesecake bars are ready when the edges are firm, and the center has just a slight jiggle. Keep an eye on them to avoid overbaking.
Step3: Add the Cherry Topping
- Cool the cheesecake. Once the cheesecake is baked, allow it to cool to room temperature.
- Spread the cherry topping. Once cooled, evenly spread the cherry pie filling over the top of the cheesecake.
- Refrigerate. Refrigerate the bars for at least 2 hours, allowing the flavors to set and the cheesecake to firm up.
Step4: Slice and Serve
- Cut into bars. After the cheesecake has chilled, slice it into squares or bars. These are perfect for serving at parties or gatherings.
- Serve and enjoy. You can serve these bars as-is or add a dollop of whipped cream or a scoop of vanilla ice cream for an extra treat!
Nutritional Information
Here’s a breakdown of the approximate nutritional content for each serving of Cherry Cheesecake Bars:
- Calories: 250 per serving
- Total Fat: 18g
- Saturated Fat: 10g
- Cholesterol: 70mg
- Sodium: 150mg
- Total Carbohydrates: 21g
- Dietary Fiber: 1g
- Sugars: 16g
- Protein: 4g
While these bars are certainly a delicious indulgence, they’re packed with flavors that make every bite worthwhile!
Healthier Alternatives for the Recipe
If you want to make this recipe a little healthier, here are some simple swaps that won’t compromise on taste:
- Use low-fat cream cheese. Opting for low-fat cream cheese or Greek yogurt will reduce the fat content without sacrificing texture.
- Natural sweeteners. Replace granulated sugar with honey or maple syrup for a more natural sweetening option.
- Gluten-free crust. Swap graham cracker crumbs with gluten-free cookie crumbs or almond flour for a gluten-free option.
- Fresh fruit topping. Instead of using a canned cherry filling, try fresh cherries or other berries to cut down on processed sugars.
These healthier alternatives let you enjoy a guilt-free dessert without losing the essence of the original recipe.
Serving Suggestions
These Cherry Cheesecake Bars can be served in various ways to enhance their appeal and make them even more irresistible:
- Pair with whipped cream. A dollop of freshly whipped cream adds a light, fluffy texture that contrasts beautifully with the creamy cheesecake.
- Serve with ice cream. For an indulgent treat, pair these bars with a scoop of vanilla or chocolate ice cream.
- Garnish with mint. Add a sprig of fresh mint on top for a pop of color and a hint of freshness.
Each of these options will add a personal touch to your dessert table.
Common Mistakes to Avoid
While these Cherry Cheesecake Bars are relatively simple to make, there are a few common pitfalls to avoid:
- Overmixing the filling. Be sure not to overmix the cheesecake filling. Overmixing can cause air bubbles, leading to cracks on the surface of the cheesecake.
- Not letting the cheesecake cool enough. Don’t rush the cooling process. Let the cheesecake cool completely before adding the cherry topping and refrigerating it.
- Using cold cream cheese. Always use softened cream cheese for the smoothest texture. Cold cream cheese can result in lumps and an uneven filling.
Avoid these mistakes, and you’ll be on your way to a perfectly made dessert.
Storing Tips for the Recipe
If you find yourself with leftovers, here’s how to store them for later:
- In the fridge. Store the Cherry Cheesecake Bars in an airtight container in the refrigerator for up to 5 days.
- Freezing. These bars freeze wonderfully. Wrap them tightly in plastic wrap, then place them in a freezer-safe container. They can be stored in the freezer for up to 2 months. Be sure to let them thaw in the fridge before serving.
Conclusion
Cherry Cheesecake Bars are the perfect dessert for any occasion. With a simple crust, creamy filling, and delicious cherry topping, they’re sure to be a hit at your next event. Why not try making them today? Share your thoughts in the comments, or subscribe to get more delicious recipes delivered right to your inbox!
FAQs
How long should I let the cheesecake cool before adding the topping?
Let the cheesecake cool for about 30 minutes before adding the cherry topping, then refrigerate for at least 2 hours.
Can I use a different fruit for the topping?
Yes! Fresh berries, such as blueberries, raspberries, or strawberries, work wonderfully as a topping.
Can I prepare this recipe ahead of time?
Definitely! These Cherry Cheesecake Bars can be made a day ahead. Just store them in the fridge, and they’ll stay fresh for up to 5 days.
How can I make these bars richer?
For a more decadent treat, drizzle chocolate ganache over the bars or sprinkle crushed nuts on top for added texture.